How to Disable Past Dates in Bootstrap 5 Datepicker
Have you ever wanted to prevent users from selecting past dates when using a date picker in your web application? I recently faced this challenge and decided to share my experience on how to do it using Bootstrap 5 Datepicker.
It's a useful feature to ensure that only future dates can be selected, which can be particularly handy for reservation systems, event booking forms, or any situation where past dates are irrelevant or unwanted.
In this article, I'll walk you through the steps I followed to disable past dates in Bootstrap 5 Datepicker, using straightforward language and simple instructions. Even if you're not a coding expert, you'll be able to implement this restriction and enhance the user experience on your website.
Let's get started!
Before you begin, make sure you have the following prerequisites in place:
- A working Bootstrap 5 project.
- Bootstrap CSS and JavaScript files are included in your project.
- Bootstrap Datepicker plugin integrated into your project.
If you haven't already integrated Bootstrap and Datepicker, you can include them by adding the following lines in the HTML file's head section.
<link href="https://maxcdn.bootstrapcdn.com/bootstrap/5.0.0/css/bootstrap.min.css" rel="stylesheet">
<script src="https://ajax.googleapis.com/ajax/libs/jquery/3.6.0/jquery.min.js"></script>
<script src="https://maxcdn.bootstrapcdn.com/bootstrap/5.0.0/js/bootstrap.min.js"></script>
<script src="https://cdn.jsdelivr.net/npm/[email protected]/dist/js/bootstrap-datepicker.min.js"></script>
<link rel="stylesheet" href="https://cdn.jsdelivr.net/npm/[email protected]/dist/css/bootstrap-datepicker3.min.css">
Create an input field in your HTML where users can select a date. You can use the data-datepicker attribute to indicate that this input field should be used as a date picker. For example.
<input type="text" id="datepicker" data-datepicker>
To enable the datepicker, you need to initialize it using JavaScript. Place the following script at the end of your HTML file, just before the closing </body> tag.
<script>
    $(document).ready(function () {
        $('#datepicker').datepicker();
    });
</script>
To disable past dates, you can use the startDate option of the Bootstrap Datepicker. Modify the script to set the startDate to the current date. This prevents users from selecting dates earlier than the current date.
<script>
    $(document).ready(function () {
        $('#datepicker').datepicker({
            startDate: new Date()
        });
    });
</script>
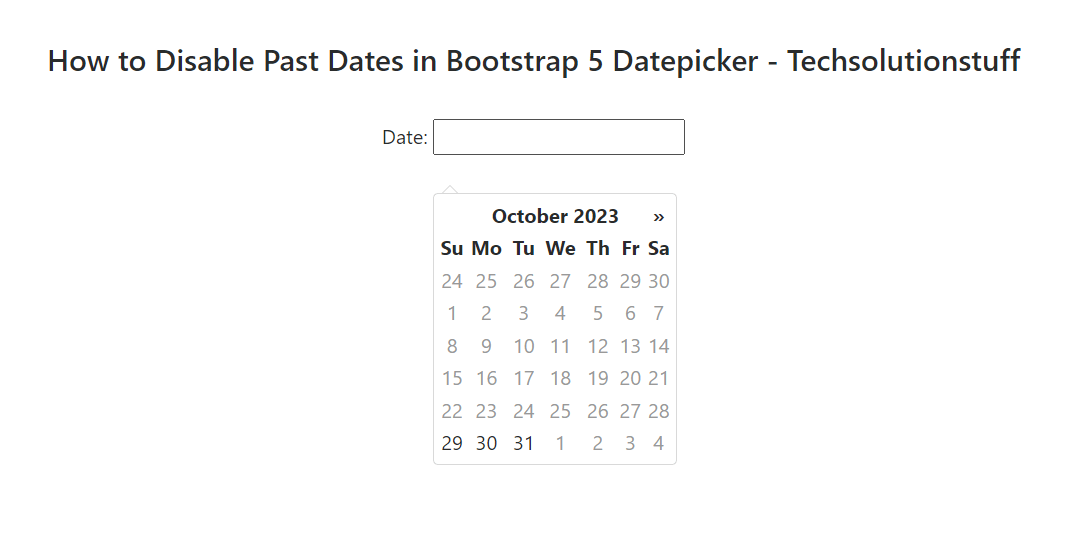
With this setup, the datepicker will only allow users to select dates from the current date onwards.
Output:
You can further customize the Datepicker to fit your needs. For example, you can change the date format, add placeholders, or configure other options. Refer to the Bootstrap Datepicker documentation for a list of available options: https://bootstrap-datepicker.readthedocs.io/en/latest/options.html
In this journey to disable past dates in Bootstrap 5 Datepicker, we've successfully achieved our goal. It's a small change with a significant impact on the user experience of your web application.
By restricting the selection of past dates, you ensure that your users are always working with current or future dates, which is essential for various applications like event booking, reservation systems, and more.
You might also like:
- Read Also: How to Add Bootstrap 5 Datatable Example
- Read Also: How To Localize Bootstrap 5 Datepicker Example
- Read Also: How to Validate Input Based on Condition in Laravel 10
- Read Also: How To Display Multiple Months In Bootstrap 5 Datepicker


