How To Use Sweetalert2 In Laravel
In this article, we will see how to use sweetalert2 in Laravel. You can use sweetalert2 in laravel 8 as well as PHP. sweetalert2 is used to create different types of custom alert messages or you can create custom popups like success messages, error messages, warning modals, confirm modals, custom notifications, etc.
So, let's see how to use sweet alert in laravel 8, custom alert messages, sweetalert 2 laravel CDN, flash message laravel sweetalert2, laravel sweet alert success, sweet alert delete confirmation laravel 8, sweet alert laravel ajax, how to use sweet alert in HTML.
Normally, javascript provides a simple alert box in your browser but if you want to display a custom popup then sweetalert2 is a very effective library that allows us to create all kinds of alert messages that can be customized to match the look and feel of our own website.
First, We need to add a javascript file and CSS file to implement sweetalert2. So, copy the sweetalert2 js file and sweetalert2 css file and add in the head tag.
<script src="https://cdn.jsdelivr.net/npm/[email protected]/dist/sweetalert2.all.min.js"></script>
<link rel='stylesheet' href='https://cdn.jsdelivr.net/npm/[email protected]/dist/sweetalert2.min.css'>
Now, we need to call the sweetAlert2 function after the page has loaded.
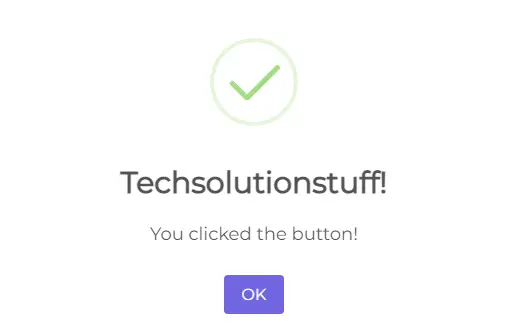
Here, I am giving you a simple example.
Swal.fire(
  'Techsolutionstuff!',
  'You clicked the button!',
  'success'
)
Output:

Here we will see different types of sweetalert2 examples.
Display basic or simple messages.
Swal.fire('Hello')
Display the title under the text.
Swal.fire(
  'The Demo?',
  'This is Demo ?',
  'Asking'
)
Display Icon, title, and text.
Swal.fire({
  icon: 'error',
  title: 'Not Found...',
  text: 'Something went wrong!',
  footer: '<a href>Are you facing any issue?</a>'
})
Display modal window with long content or images displays in the modal.
Swal.fire({
  imageUrl: 'https://placeholder.pics/svg/300x1500',
  imageHeight: 1500,
  imageAlt: 'Big image'
})
Display HTML content with buttons.
Swal.fire({
  title: '<strong>HTML <u>example</u></strong>',
  icon: 'info',
  html:
    'You can use <b>bold text</b>, ' +
    '<a href="//sweetalert2.github.io">links</a> ' +
    'and other HTML tags',
  showCloseButton: true,
  showCancelButton: true,
  focusConfirm: false,
  confirmButtonText:
    '<i class="fa fa-thumbs-up"></i> Great!',
  confirmButtonAriaLabel: 'Thumbs up, great!',
  cancelButtonText:
    '<i class="fa fa-thumbs-down"></i>',
  cancelButtonAriaLabel: 'Thumbs down'
})
Display cancel button, save button, and deny button.
Swal.fire({
  title: 'Do you want to save the changes?',
  showDenyButton: true,
  showCancelButton: true,
  confirmButtonText: `Save`,
  denyButtonText: `Don't save`,
}).then((result) => {
  /* Read more about isConfirmed, isDenied below */
  if (result.isConfirmed) {
    Swal.fire('Saved!', '', 'success')
  } else if (result.isDenied) {
    Swal.fire('Changes are not saved', '', 'info')
  }
})
Display modal with a customized position like top-end, top-start, etc.
Swal.fire({
  position: 'top-end',
  icon: 'success',
  title: 'Your work has been saved',
  showConfirmButton: false,
  timer: 1500
})
Display the confirm modal with the confirm button and cancel button and also display the success message after confirmation.
Swal.fire({
  title: 'Are you sure?',
  text: "You won't be able to revert this!",
  icon: 'warning',
  showCancelButton: true,
  confirmButtonColor: '#3085d6',
  cancelButtonColor: '#d33',
  confirmButtonText: 'Yes, delete it!'
}).then((result) => {
  if (result.isConfirmed) {
    Swal.fire(
      'Deleted!',
      'Your file has been deleted.',
      'success'
    )
  }
})
Display the image in the modal using imageUrl.
Swal.fire({
  title: 'Sweet!',
  text: 'Modal with a custom image.',
  imageUrl: 'https://unsplash.it/400/200',
  imageWidth: 400,
  imageHeight: 200,
  imageAlt: 'Custom image',
})
Close modal with time duration.
let timerInterval
Swal.fire({
  title: 'Auto close alert!',
  html: 'I will close in <b></b> milliseconds.',
  timer: 2000,
  timerProgressBar: true,
  didOpen: () => {
    Swal.showLoading()
    timerInterval = setInterval(() => {
      const content = Swal.getContent()
      if (content) {
        const b = content.querySelector('b')
        if (b) {
          b.textContent = Swal.getTimerLeft()
        }
      }
    }, 100)
  },
  willClose: () => {
    clearInterval(timerInterval)
  }
}).then((result) => {
  /* Read more about handling dismissals below */
  if (result.dismiss === Swal.DismissReason.timer) {
    console.log('I was closed by the timer')
  }
})
In the modal, you can add AJAX calls like the below code.
Swal.fire({
  title: 'Submit your Github username',
  input: 'text',
  inputAttributes: {
    autocapitalize: 'off'
  },
  showCancelButton: true,
  confirmButtonText: 'Look up',
  showLoaderOnConfirm: true,
  preConfirm: (login) => {
    return fetch(`//api.github.com/users/${login}`)
      .then(response => {
        if (!response.ok) {
          throw new Error(response.statusText)
        }
        return response.json()
      })
      .catch(error => {
        Swal.showValidationMessage(
          `Request failed: ${error}`
        )
      })
  },
  allowOutsideClick: () => !Swal.isLoading()
}).then((result) => {
  if (result.isConfirmed) {
    Swal.fire({
      title: `${result.value.login}'s avatar`,
      imageUrl: result.value.avatar_url
    })
  }
})
You might also like:
- Read Also: Carbon Add Days To Date In Laravel
- Read Also: How To Check RAM And CPU Usage In Laravel
- Read Also: How to Deploy Laravel on Heroku with Database
- Read Also: How To Integrate Stripe Payment Gateway In Laravel 8


